You are currently browsing the category archive for the ‘DIY’ category.
Garbage Picking, Dumpster Diving, D-Mart, Skip-raiding, Trashing, Curbside Salvage…
Whatever you call it, I just did it! Thanks to your brave confessions I just mustered the courage to pull my car into some stranger’s driveway, inspect a find and then load it into my car. I feel a little bit of a shopper’s high, but without the guilty post-purchase letdown! I can’t wait to show my hubby what I found for FREE! I cannot believe someone would throw away something in such good shape, and solid wood construction. It doesn’t even need much repair.
If I can ever get the #$^%^* chairs I got from ReStore done (don’t get me started on trunkated nap times and hubby with “pirorities”) I’m going to give my little curbside gem a new life.
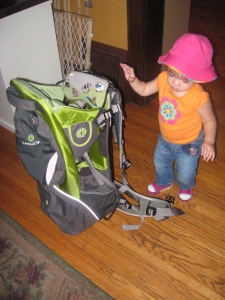
Here’s a peek at a future project – four dining chairs I found at the ReStore. Arden has a thing for chairs, so she joined the photo shoot:
We have Dave’s Great-grandparents’ table and chairs from their Oregon homestead that are just for show. We rarely sit on them, and hold our breath when we do. They’re over 100 years old and have smoke and fire damage from vandals. These chairs are pretty sturdy, though at least one of them will need a new piece of plywood for the seat. They’ve had a really sloppy refinish at some point, but I think they’ll look great with some paint and glaze. I’m pondering a nice grass green. I like the robin’s egg blue that’s really popular, but it wouldn’t really go with the rest of our decor. If the chairs turn out nice, I might try painting the table legs to match, and then refinish the top. I want to have these done in time for Thanksgiving when my parents will be visiting so we can have dinner and not fear falling into a heap during dessert!

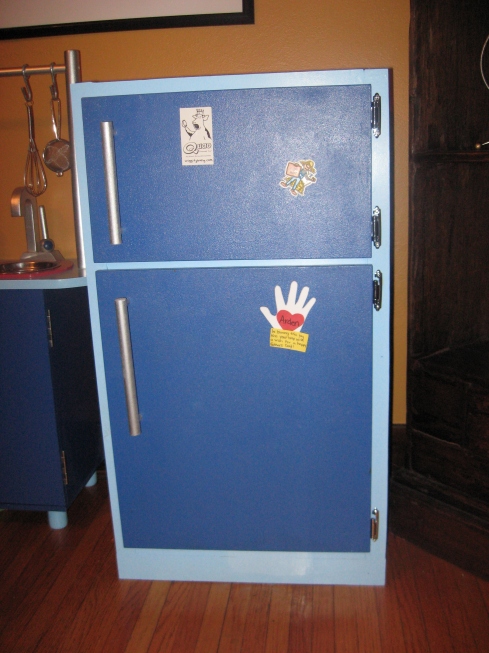
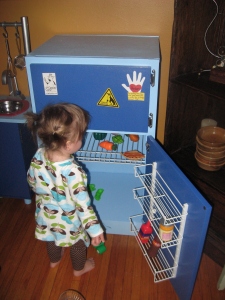
Sew Dang Cute has a brand new competition – Crafting With the Stars. I submitted my DIY Play Rifridgerator project. Please, please go check out the entries and click on mine – number of views may be considered in the audition process!
Wish Me Luck!
I am super-geeked about this project. Arden loves it already, and I am pretty darn pleased with myself for making it for her! Super-hubby Dave has been busy with major outdoor projects for several recent weekends (fence installation, garage demolition), so I decided that Labor day weekend would be my DIY weekend. I was inspired by Brittany on Mommy Words post for a DIY Play Kitchen. I found the same plans on Lowe’s that Brittany used.
First, to get a little time without “help” from Arden. The win-win solution: A hike with Daddy!
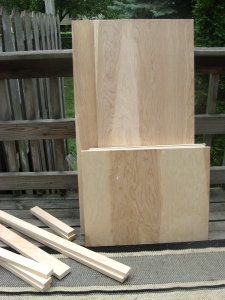
- I had the plywood cut at Lowe’s. Since I don’t have a table saw, this seemed like the easiest solution. They didn’t even charge me a cutting fee. I had to cut the 1x6x8 board for the rails, stiles, toe kick, and cleats using a skill saw.
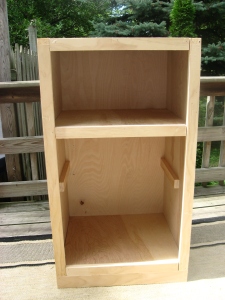
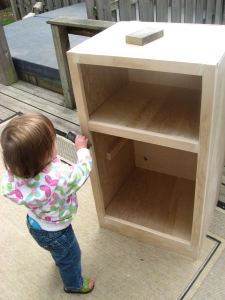
- Construction of the box. The plans called for actual cabinetry construction with pocket screws. I didn’t think this required that level of craftsmanship, so I glued and nailed the box together, and then glued and nailed the rails and stiles, etc. to the box. Much quicker and in the end, way easier to fudge the inaccurate cuts (Lowe’s, not mine of course!).
- I filled in the gaps, nail holes and the rough ends of the plywood with wood filler, then sanded everything down. Arden had since returned from her hike with Daddy, and was now “helping”. Good thing she wasn’t around for the sawing and hammering! Sophie the dog also got into the action by repeatedly stealing one of the sanding blocks and running away with it.
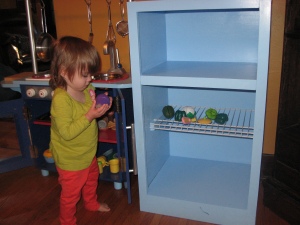
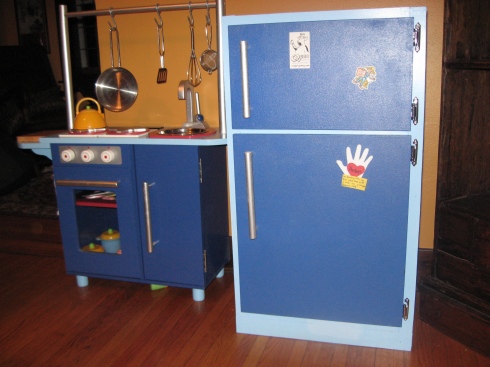
- I painted the cabinet light blue to match the garage sale find kitchen play set I already had, and put the 12″ deep wire shelving onto the cleats.
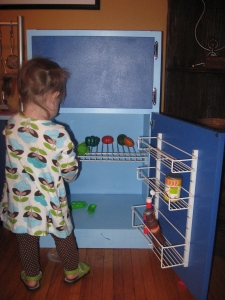
- I attached the doors to the cabinet using flush mount self-closing hinges. Arden “helped” some more.
Now for some of the things I did that I think are really cool:
- I attached a Closetmaid spice rack to the inside of the refrigerator door to act like the door organizers.
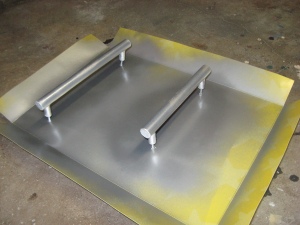
- I made handles out of dowels painted with stainless steel spray paint to match the kitchen play set.
- I primed the refrigerator and freezer doors with magnetic paint before painting them the darker blue to match the kitchen play set. Now she can attach magnets to her completed refrigerator! I love it!
So, here’s the completed project with the kitchen play set I was matching it to. The scale is a little bit off, but I like the size of the play fridge for Arden.
Good luck! This was a pretty ambitious project for me, but I think it was totally worth it and turned out really well. Please feel free to comment with any questions.
One of the main features of Arden’s nursery is a peg rail going around the room. The idea was a bit of a collaboration between my mother and myself. I knew I wanted some kind of a detail going around the room, but I didn’t like the idea of a chair rail. Mom suggested using knobs, an idea which I really liked. Once we had a general idea in place, I began getting the nursery put together.
I didn’t want a super girlie-girl room, since the ultrasound tech didn’t seem 100% sure that Arden really was a girl (she was). So, I went with two shades of green – lighter on top and darker on bottom for most of the room, and used the lighter green for the funky angles and little nook where the bench and two closets are. Pardon the picture of my gigantic belly, but it’s the only picture I have showing the painted room before the peg rail.
Then I had to source the knobs. I wanted to find vintage/antique glass and metal knobs, but a couple of trips to the local antiques center yielded nothing. I found a few knobs at Home Depot, but I still wasn’t finding the right mix of knobs. I found an online store called myknobs.com (I know, a bit obvious, but they had what I was looking for), and rounded out my selection of knobs.
I got 7/16″ x 2 5/8″ pine molding to make the rails out of and painted them white. Since these were cabinet knobs and meant to mount on something of which you could access the back, I had to attach the knobs to the rail before installing it. As the lumber was thinner than a standard cabinet, I also had to get shorter screws of the same diameter so the knobs would lie flush to the lumber. I measured and cut the boards to the lengths for the wall sections, and planned out where the knobs would go. I think I used 11″ spacing, with the knobs centered on the wall sections for shorter sections.
I drilled the holes for the screws at the marked intervals. I needed the screw head to be below the surface of the board so it would mount flat on the wall, so I drilled a shallow hole on the back of the board larger than the screw head. I put tape around the drill bit to ensure I didn’t drill too deep.
Then I attached the knobs using the shorter screw. They needed to be on good, as I wouldn’t be able to access the screw again once the boards were installed.
Then I attached the pieces to the wall using finish nails. I filled the nail holes and asked my brother to caulk along the top and bottom of the boards to get a nice finish.
I put up the curtains and all the bedding and had carpet installed. The dresser and desk were my childhood set that I painted black and changed out the hardware several years back. We got a black crib and everything looks really nice together. The crib is convertible to a toddler and then full size bed, so it will grow with Arden.
The peg rail has turned out to be way handier than I ever anticipated. We have signs, the diaper stacker, wet bags, coats, blankets, and towels hung on the knobs all around the room. Here’s a photo showing it in action during Arden’s first bath at home:
So, this is where I’m supposed to say something incredibly witty about myself and why I’m starting this blog. Well. Umm. Here goes nothing. Can’t promise witty, but it will be about me and why I’m starting this blog
I’m a 30-something mother to Arden, my adorable little girl who I love more than my arms can hold. My awesome physicist husband Dave and I have been married for 3 years. We have two black labs named Laser and Sophie, and three cats named Erwin, Otto, and Poe. We didn’t start out intending to have a menagerie, but between his cats (Erwin and Otto), my cats (Bailey and Frank), losing two cats (Frank and later diabetic Bailey) fostering a PAWS With a Cause dog (Laser), the PAWS dog getting “career changed” and we decided to keep the frustrating but loveable lug, adopting a friend for said lug (Sophie), and finding a discarded black cat (Poe) just before Halloween one year, stuff happens. I’m a sometimes runner and former (and hopefully future) marathoner. I spent over ten years training and teaching Muay Thai and while I miss how empowered and fit that made me feel, I really don’t miss the time investment or all the bruises!
I’ve been crafting as long as I can remember. I made doll’s clothes while staying with my grandma on her antique Singer. My mom taught me how to cross-stitch when I was little, and we sewed a whole bedding ensemble for my cabbage patch doll Krissy Lynn. Later Mom taught me how to crochet (which I’ve since forgotten), and let me go with her to her monthly craft group, and occasionally sit in on her weekly stitch gathering. As an adult, I learned how to quilt, and tried to start my own craft group where a friend taught me how to knit. During my pregnancy, my nesting instinct took the form of sewing and knitting, and I made burp cloths out of cloth diapers, quilts for expecting friends, and knitted like a woman posessed. After Arden was born, I made my husband and my brother-in-law “man slings” after Dave kept poaching my pink one. Now, I’m trying to begin a small business selling “simply sweet designs for tiny people” on Etsy.
My Dad was a home builder and instilled in me a can-do attitude. I’m not afraid of power tools, and am willing to try anything once. I’ve tiled my own bathroom, re-fashioned an antique window into a shadow box/shelf, made a rolling ottoman out of a drawer, and re-screened a sliding door to name a few.
I hope you find something I write here interesting, funny, helpful, or inspirational.
Gotta run,
Jenn


